Tuesday, February 28, 2012

Funny Art Work

I had to share this because this was something that made me laugh for a while.  Let me start by saying my daughters both love art and are very good artists.   Lily has been following in her sisters footsteps every since I can remember.  What ever Emma is doing, Lily is not far behind.  I think Lily is 2 1/2 trying to be 7 all the time.  Lily has these mad drawing skills though.  Here's a picture she colored around 2 years of age using markers.


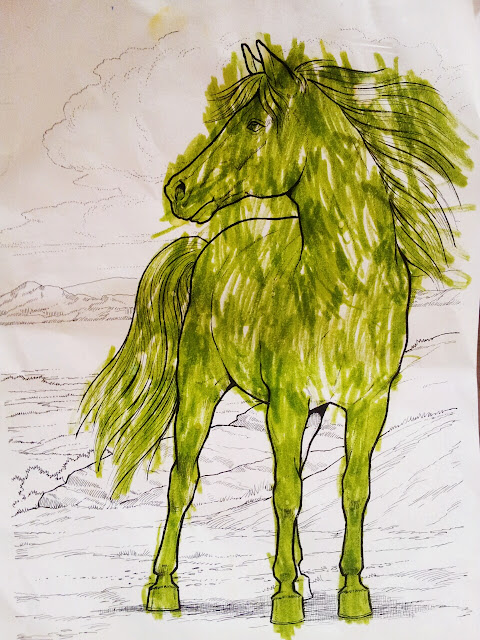
It's unbelievable that she stays in the lines so well.  That's changed a little bit now that we have her in preschool/daycare.  We find that she wants to copy a lot of the kids so she is imitating what we call scribble scrabble.  Totally normal for her age, but it's hard to get her to draw so nicely again.


Still not bad and she does a nice job.  We got Emma a new sketchbook and Lily got a mini one of her own.  A pocket size sketchbook that is easy for her to carry.  Here's her picture.  She described her picture to us.


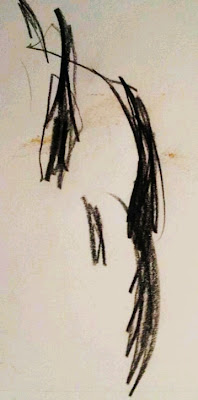
Are you ready for this... she said it was a cheese stick.  How cute and it made me chuckle really hard.  She jumped up and down just saying, "Cheese stick Mommy!  Cheese stick Mommy!"  You know.  I can see it.  That would be the one to the right.  I can see how that would be a cheese stick to her.  The little things that make us smile are truly sometimes...very little.  


Hi everyone!  I've moved to artzycreations.com.  Check out my new website.  I am always producing new material so please check it out and follow me there.
Many Thanks,
Melanie

Sunday, February 26, 2012

Shamrock Shirt Tutorial


It's that time of year again when that little mischievous green guy known as the leprechaun celebrates his day.  I love St. Patrick's Day and am part Irish.  No, I'm not just saying that for the convenience of the holiday.  Insert smiley face here.  In our house we celebrate by wearing green, and eating corned beef & sour kraut.  Well, to make sure you and your kids are wearing green and don't get pinched...  here is a great tutorial that is very easy and inexpensive to make.  Here is what you will need:


Materials Needed


-1 Green Shirt: I purchased mine at Walmart.  These are the cheapest I've found and are cut to fit a girl nicely.  Only $3.47.  Yes, for all of you Target lovers out there, I did check Target and I couldn't find a girls basic green shirt.)
-Nylon Lime Green Tulle: 1/2 a yard will leave you with left over tulle.  Only $.75.  You could also use a soft green or white.
-Fabric Marker
-Thread To Match The Tulle
-Scissors
-Cardboard
-Pencil


Step 1:
Find a picture as a reference to draw the leaf of a clover.  I found this site: http://www.webweaver.nu/clipart/st-patricks-shamrocks.shtml


Cardboard Shamrock Leaf Template


Step 2:
Draw one of the shamrock leaves on cardboard keeping in mind you will have to size the leaf according to the size of the shirt you are embellishing.  (Smaller shamrock for a smaller child.)  Cut out one of the leaves of the shamrock out of the cardboard as a template.


Trace Leaf Template onto T-Shirt


Step 3:
Trace the leaf template with your fabric marker.  I tried a fabric pencil too, but the marker was much easier for me to use.  Do this 3x's.  Eyeball it and make sure your clover is looking like a clover. Don't forget to hand draw the outline of the stem of the clover.


Creating Tulle Ruffle


Step 4:
Next, cut your tulle strips 1" wide.  Ruffle the strips.  Sew the strips in the middle of the tulle and pull one of the threads to get the tulle to ruffle.


Outline Shamrock and Pin in Place


Step 5:
Take your ruffled strip and follow the outline of your shamrock.  Pin it while you go.


Sew Tulle in Place


Step 6:
Sew tulle in place. Continue to do this around the entire shamrock.  I had four rows of the tulle.  Yours might vary depending on the size of your shamrock.


Here's to not getting pinched.
Happy St. Patrick's Day!


Hi everyone!  I've moved to artzycreations.com.  Check out my new website.  I am always producing new material so please check it out and follow me there.
Many Thanks,
Melanie

Saturday, February 25, 2012

Dresser Remake-Part II

So, here's a look at the entire dresser sanded.  It looks different already.  Oh my, it was a TON of work.  This is definitely turning out to be a true labor of love.


I still can't get over the fact that this was free.


Lily excited about her dresser.  She's giving a real funny smile here.  My little Picasso thinks she's going to get her little paws on the dresser here.


This expression is priceless and says it all.  I told her that Mommy had to do most of the work.  She really didn't like that.  Save the paint brush for another day my Picasso.


When I said she could help a little bit, she was all goofy smiles again. Stay tuned for part III.  We're tackling the drawers next.


Hi everyone!  I've moved to artzycreations.com.  Check out my new website.  I am always producing new material so please check it out and follow me there.
Many Thanks,
Melanie


Wednesday, February 22, 2012

Estate Sale Finds

Ooh La La! Can you say WOW!  Every so often, I try to go to an estate sale.  I can't go too often because I think I would seriously be very broke.  No joke!  I am a part of this estate sale following with Lady Z (I will call her) and her husband.  They are the cutest elderly couple that have this great business.  They definitely have the market cornered in my neighborhood and the surrounding neighborhoods as well.  Anyhow, what a wonderful sale.  I got there very early and waited with some of the veteran estate sale goers.  I went because they had advertised sewing items.  So, there I was with box in hand.  Look, what I found.


Beautiful salt and pepper shakers.  I think these are salt and pepper shakers.  At least, that's what they will be used for.  They look like they are Spanish or Turkish.  They were $3.00.


Necklace for $1.00 that is made out of leather and stone.


Sewing items at $.25 and $.50 for the bag of buttons.


Two 90" vintage table cloths at $6.00 a piece which I got for the outdoor table for the summer.  I love vintage prints.


Last, but not least.  The vintage acrylic sewing box which is totally loaded for only


  ... $3.00.


Monday, February 20, 2012

Modern Tape Art Tutorial


I have to back post this tutorial.  But, I absolutely loved how this project turned out and had to share it with everyone.  You too could have modern art created by yourself or your child with ZGallery looks or the look of the Guggenheim for a very low, low cost.


This artwork was created by my daughter Emma when she was just 6 1/2.  This tutorial is so simple and you'll have timeless, classic modern artwork that will be a product of your little one or yourself.


Here's what you need:

-1, 2 or 3 Canvases 12 x 12 (Depending on the size of your wall space and the look you desire.  I always pick the canvases that have the 1" finished canvas sides.  They may be more expensive then the regular canvas boards.  However, when you go to hang your finished work, you won't have to pay the additional cost of the canvas frame bars.  That will easily add an additional, $15.00 or more to your overall cost of the project.  If you can't find canvases with the 1" sides, do use the canvas boards.  They also sell the canvas frame bars at Michael's where you know you can use your 40% off coupon.  Also, here's a tip for you.  If you didn't know, you can use JoAnn coupons at Michael's.  They will only take one per visit though.


- 2  Containers of Acrylic Paint (choose 2 high contrasting colors)
- Foam Paint Brush
- Roll of Painters Tape
- Container For Your Paint
- Newspaper


Here's the 12 x 12 canvas.


Start off with your lightest color first.  If you want to use white, you could skip painting the first layer the lightest color.


Here's my daughter Emma painting the first canvas the lightest color.  It's like a butter cream color.  You will want to use the higher quality acrylic paint for this.  I prefer the Ceramcoat by Delta.  If you go with the least expensive acrylic craft paint, you will have trouble coating the canvas.  Sometimes you will get very thin layers in areas that seem somewhat transparent or you will have to put several layers of paint on the canvas.  Save yourself some time.


After the first color has dried your ready for the next step.  If the paint is not drying fast enough, which it never does for kids, use a hair dryer to speed up the process.  Next, take the painters tape and tear it in half the long way.  You may have to help your child with this part.  Apply the tape and make sure to wrap it around the edges.  Also, make sure to have your child smooth over the tape with their hands a couple of times.


Add your second color which is your darkest.  Paint over the entire canvas.  A tip to learn from our mistake...make sure to thoroughly rinse and dry out your foam brush.  Foam brushes have a tendency to hold a lot of excess water.  You can see here where the paint is very transparent.  So, make sure to squeeeeeeze that foam brush out really well.  Give the darkest color a couple of coats to ensure you have full coverage.


The best part is removing the tape and seeing the results.  Oooooooh!  Emma loved it.


The first painting is finished.  Now, to have Emma complete the other two.  


Hi everyone!  I've moved to artzycreations.com.  Check out my new website.  I am always producing new material so please check it out and follow me there.
Many Thanks,
Melanie


This is part of Get Your Craft On Tuesdays at Today's Creative Blog.
Also part of Tip Me Tuesday at Tip Junkie

Friday, February 17, 2012

Dresser Remake- Part I

I'm so excited.  We received a dresser for free from the people down the street.  We didn't know them very well.  But, they ended up giving us this dresser.  I'm so excited about all of the possibilities.  My youngest daughter Lily is in desperate need of a dresser.  I have been putting off paying full price for a new dresser for sometime now.  I just couldn't do it.  So, I felt very fortunate to receive this dresser.

Here is the dresser.  Wow!  It needs a lot of help and a lot of TLC.


You can see all of the damage that has been done to the dresser.  There are scratches, water marks, and writing that is set deep into the wood of the dresser.


You can see that this dresser has a white wash finish.  It also has several stickers on it.  This is just one of the stickers or what is left of it.


We started by removing all of the drawers.  We removed all of the knobs off the front of the drawers too.  Next, all of the hardware was removed from inside of the dresser.


Lily wanted to participate in the action.  Don't worry we quickly removed the screw driver from her hand.  


Stay tuned for an upcoming post on the progress of the dresser.  Great things are happening.


Hi everyone!  I've moved to artzycreations.com.  Check out my new website.  I am always producing new material so please check it out and follow me there.
Many Thanks,
Melanie

Wednesday, February 15, 2012

Zipper Bow Tutorial


I saw these great zipper bows by Hot Topic and had to make some for my daughter.  They are super easy and a lot of fun.


Here are the supplies needed.


-1 Zipper from JoAnn's or any kind will do.
(I used a 24" zipper in black.  Regular price $5.79 and with a 40% off coupon it ended up being $3.47 not including tax.  You should be able to get a least 3 bows out of the one zipper.)
-Hot Glue Gun
-3/8" Grosgrain Black Ribbon
-1 Metal Hair Clip
-1 Pair of Scissors


If you have ever made bows, you know that you have to put ribbon on the metal clip.  Start with the inside of the clip.  Put a little hot glue down.  Just a little because it will squirt out everywhere.  Plus, you don't want to burn your finger on the hot glue.  Continue to wrap the outside of the metal clip with ribbon.  Hold the clip open while you are putting the ribbon on top.  The glue will squish through to the bottom of the top of the clip.  Continue all the way around until the entire clip has been covered with ribbon adding hot glue as needed. 


Cut the zipper at the one end as close as you can get to the end.   This will allow you to make as many bows as possible out of the one zipper.


I ended up making it about 6 1/4" in length.  You can eyeball this too.  If you want the bow to be longer,  just add more zipper.


Wrap the bow around .  Hot glue the both ends down.


When I hot glued the end down, I tucked the the ends in too.  Pinch the bow together and wrap a piece of the ribbon around the center.  Hot glue the zipper bow to your clip and you're finished.  Much cheaper than Hot Topic too.


Image courtesy of Hot Topic

Hot Topic has three for $8.00.  By the time you pay tax it's close to $10.00.  It's all about do it yourself.  Now, I'm going to find zippers that are gold.


Hi everyone!  I've moved to artzycreations.com.  Check out my new website.  I am always producing new material so please check it out and follow me there.
Many Thanks,
Melanie

Tuesday, February 14, 2012

Homemade Orange Juice

This is one thing that my girls and I love to do.  We love making orange juice.  This is the time of year our orange tree in the back, even though it is small, has lots of oranges on it.  We can't wait till they are ripe enough to juice.  So, today we did a second round of juicing.  It was so much fun.  We have an old Black & Decker hand juicer that works just perfect for this.


Oranges from our orange tree.


The old school juicer.


Emma making orange juice.


Lily's turn to make juice.


Yummmmm!


Yummy goodness at it's best.  Sweetness the natural way.  The way it should be.

Sunday, February 12, 2012

Milk Jug Valentine's Day Holder

Looking for a new idea to recycle the milk jugs that you have at home?  Well, here's an idea.  Turn your milk jug into a cute animal made out of color construction paper that hugs the bottom of the milk jug.  


Cut the top part of the milk jug off.  Right below the handle.  Have a pattern of an animal bear, cat, dog etc. and have your child trace it.  Cut out the animal pattern.  Glue the eyes, whiskers, heart, etc.  Put a little saying on it.  There you have a modern twist on the Valentine's Day holder.  Goodbye shoe boxes and make way for the milk jug.

Hi everyone!  I've moved to artzycreations.com.  Check out my new website.  I am always producing new material so please check it out and follow me there.
Many Thanks,
Melanie